What this article covers: How to export your claim results as a CSV file — filtering the dashboard to the exact claims you want, running the export, and understanding every column in the file you receive. Use this when you need the underlying claim-level data in a spreadsheet, rather than a PDF summary report.
What "Exporting Results" means
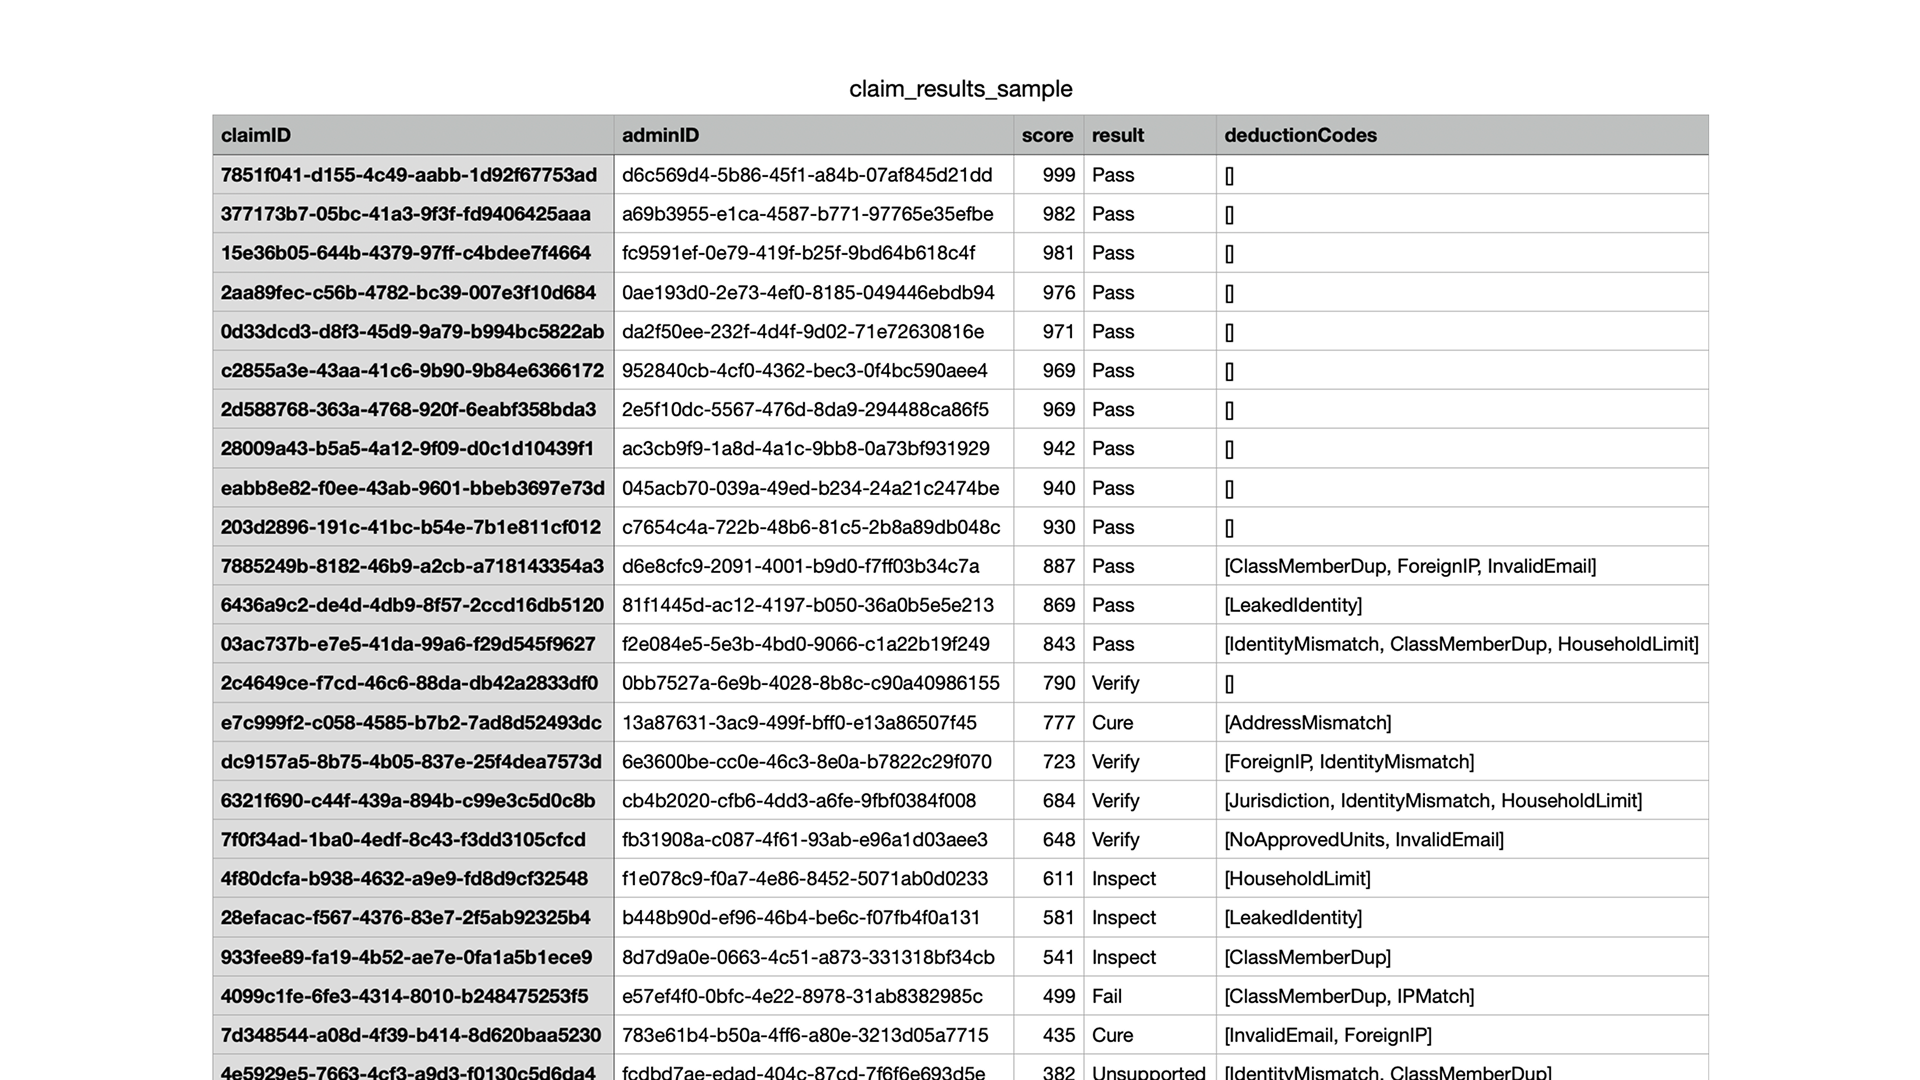
Exporting results produces a Claim Results CSV* — a spreadsheet-ready file containing one row per claim, with each claim's identifiers, score, result, and any deduction codes applied.
*Downloaded claims results will only contain up to 500,000 claims with the highest scores.
This is different from a scheduled report:
Export (this article)
Report
Output
A CSV file of claim-level records
A summary snapshot
Delivery
Downloaded to you directly
Downloaded or sent to recipients via email, immediately or scheduled
Best for
Working with the raw data in a spreadsheet, handing data to a client or expert
Sharing an overview of the data with stakeholders once or on a recurring basis
If you instead want to email a recurring snapshot to co-counsel or an administrator, see 7. Creating and scheduling reports. The two share the same filtering behavior — everything you set in the dashboard flows through to whichever you choose.
Step 1 — Filter to the claims you want
Exports respect the filters that are active on your dashboard. Set your filters before you export, and the CSV will contain only the claims that match. If no filters are applied, the export includes every claim in the case. In either scenario there is a 500,000-claim download limit, which returns the highest-scoring claims first.
Here's an example:
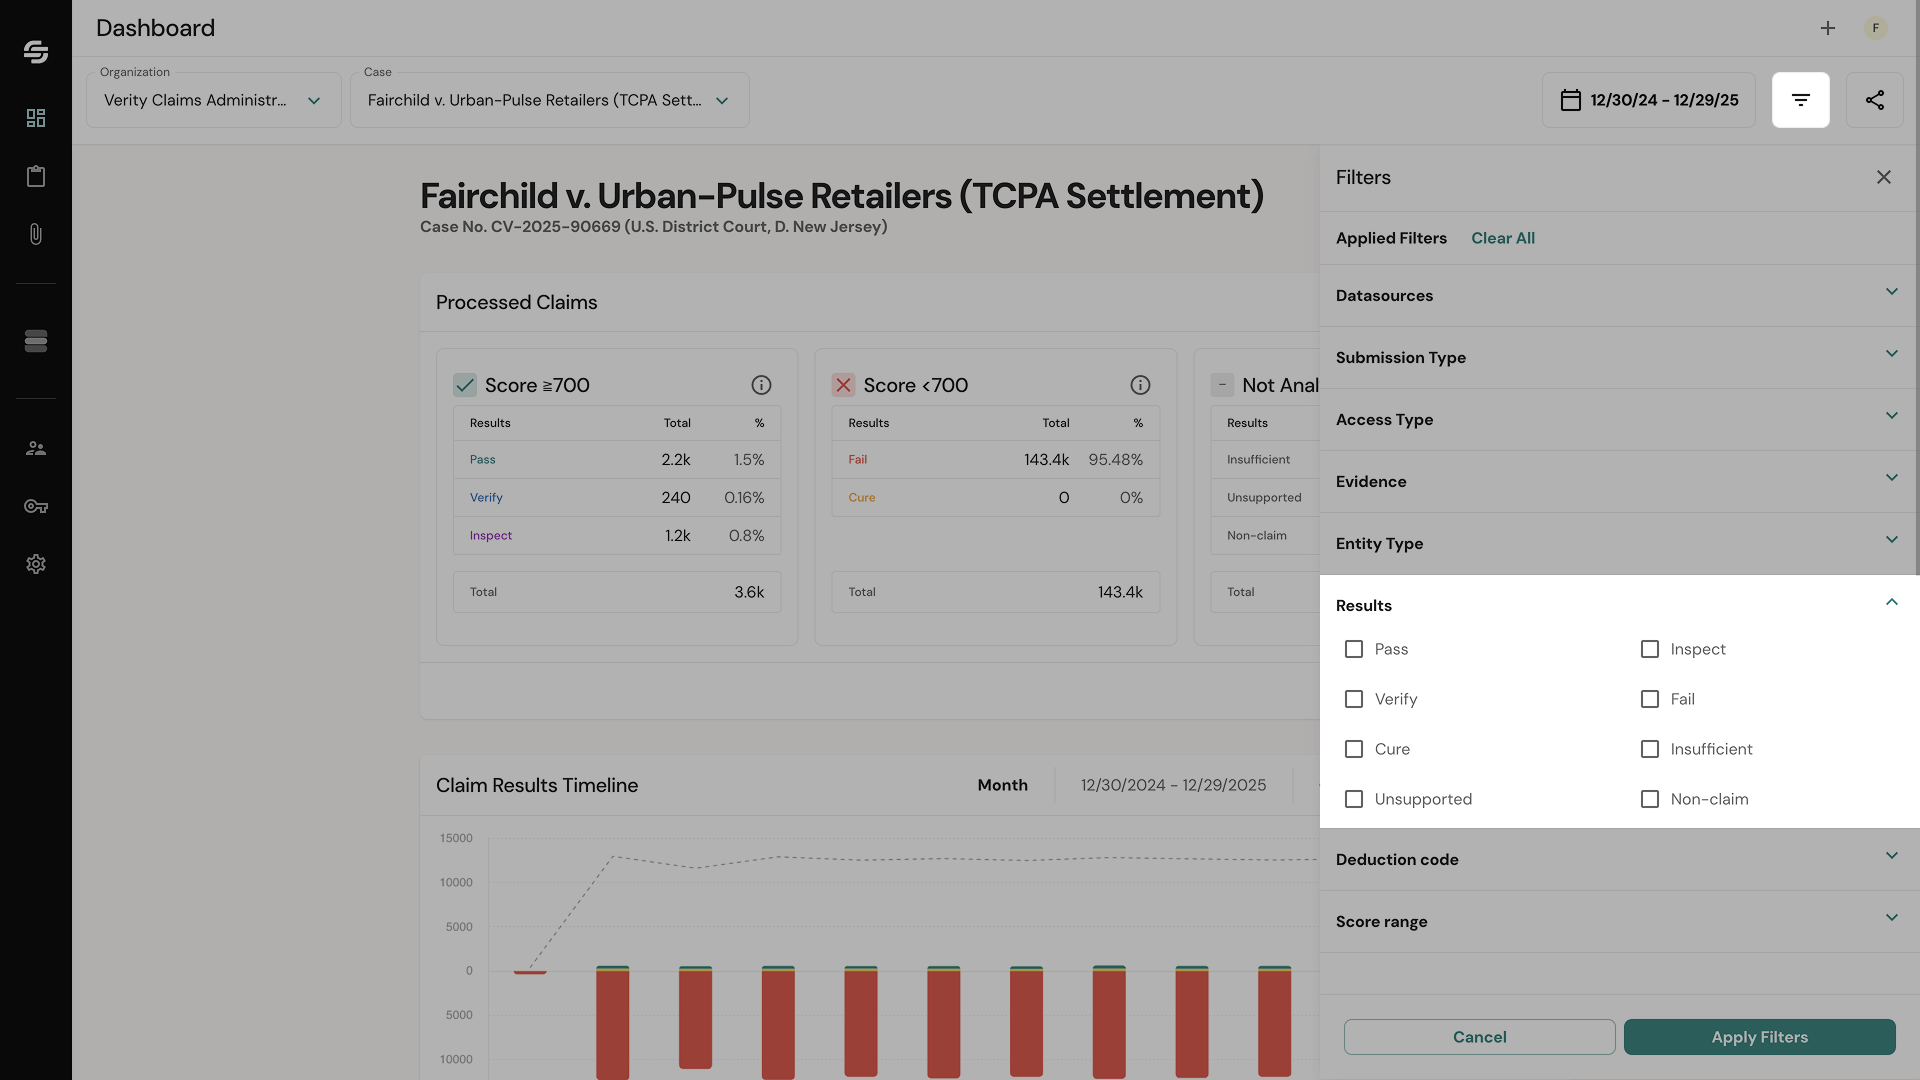
Set a Timeframe — Limit the export to a time window. Click the date-range pill to set a quick preset (Today, This Week, Last Week, Last 7 Days, Current Month) or a custom start and end date. Use this to export only claims submitted around a deadline, or to produce a periodic extract.
Select Results — Narrow the export to specific outcomes (for example, only Fail and Inspect claims for a fraud review, or only Pass claims for an eligibility list). Select one or several values in the Results section of the Filters panel.
💡 Other filters still apply. The dashboard offers additional filters beyond these two. Any filter left active will also shape your export. If your CSV looks smaller than expected, check whether a filter from earlier in your session is still applied. For how to set every filter, see 8. Filtering dashboard data.
Once your filters are set, confirm the dashboard is showing the claims you intend to export. What you see is what you get — the export mirrors the current filtered view.
Step 2 — Export the Claim Results CSV
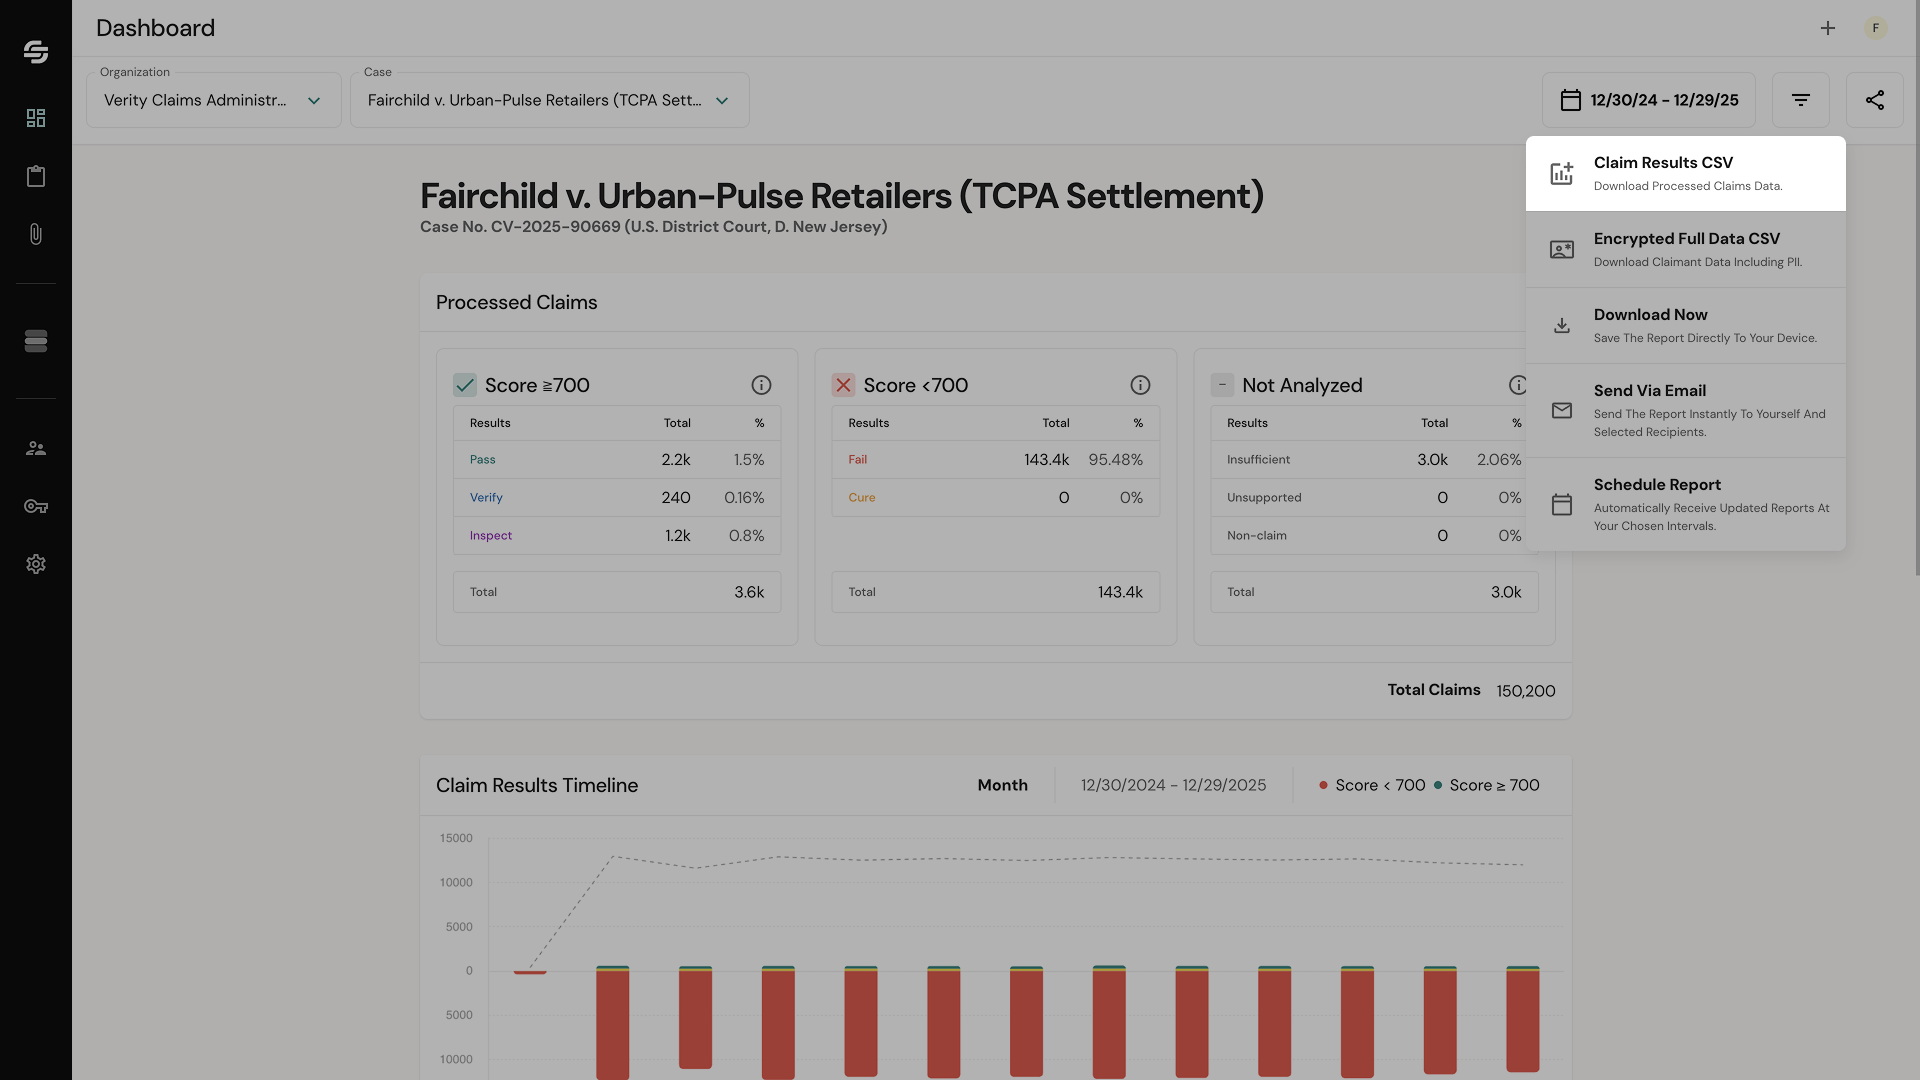
From the Dashboard, click the export button.
Choose Claim Results (CSV) as the export type.
Confirm the export. The file downloads to your device.
The file reflects your active filters at the moment you export. To change what's included, adjust your filters and export again.
What's in the file
Each row is one claim. The Claim Results CSV contains the following columns:
Column
What it is
claimID
ClaimScore's unique identifier for the claim record. Every claim received has one, and it never changes — use it to trace a specific claim across exports, dashboards, and audit records.
adminID
The identifier assigned by the claims administrator's own system. Use this to match a ClaimScore record back to the corresponding claim in the administrator's platform.
score
The claim's numeric ClaimScore. Every claim starts at 1,000 points, and points are deducted as deduction codes are applied.
result
The result assigned to the claim based on the evidence gathered during analysis.
deductionCodes
A list of the specific signals that reduced the claim's score. An empty list [] means no deductions were applied. Each code provides transparency into why the claim's score was reduced — for example, a duplicate identity or an invalid address.
💡 An empty deductionCodes ([]) is not absent data.[] means the claim triggered no deduction signals.
Understanding result
Result columns use ClaimScore's result taxonomy. These are the same categories you can filter by in the Results section of the dashboard:
Result
Meaning
Pass
Claim meets all evaluation criteria.
Inspect
Passing claims that include supporting evidence are marked for further examination.
Verify
Claim passed but shows conflicting evidence of validity and fraud. This may indicate additional information should be collected from the claimant that can be used to verify validity.
Cure
Claim failed but shows conflicting evidence of validity and fraud. This may indicate additional information should be collected from the claimant that can be used to cure the claim.
Fail
Claim failed evaluation criteria.
Insufficient
Claim lacks the necessary information to be evaluated accurately.
Unsupported
Claim type or format is not supported by the current scoring logic.
Non-claim
Submission is not a claim and has been excluded from analysis.
What happens next
Your CSV is now on your device, ready to open in a spreadsheet, share with an expert, or hand to a client. Because filters carry through identically, once you've dialed in the right filtered view you can also schedule that same view as a recurring email report — see 7. Creating and scheduling reports. To learn more about filters themselves, see 8. Filtering dashboard data.